360 Camera
Capture Tutorial
Creating a proper capture creates a better & crisp 3D model, which will make your project stakeholders happy when they view reports and meetings!
It’s no different than if you took a bad selfie with friends or a bad family photo; they would not be happy with the end product, and neither would you!
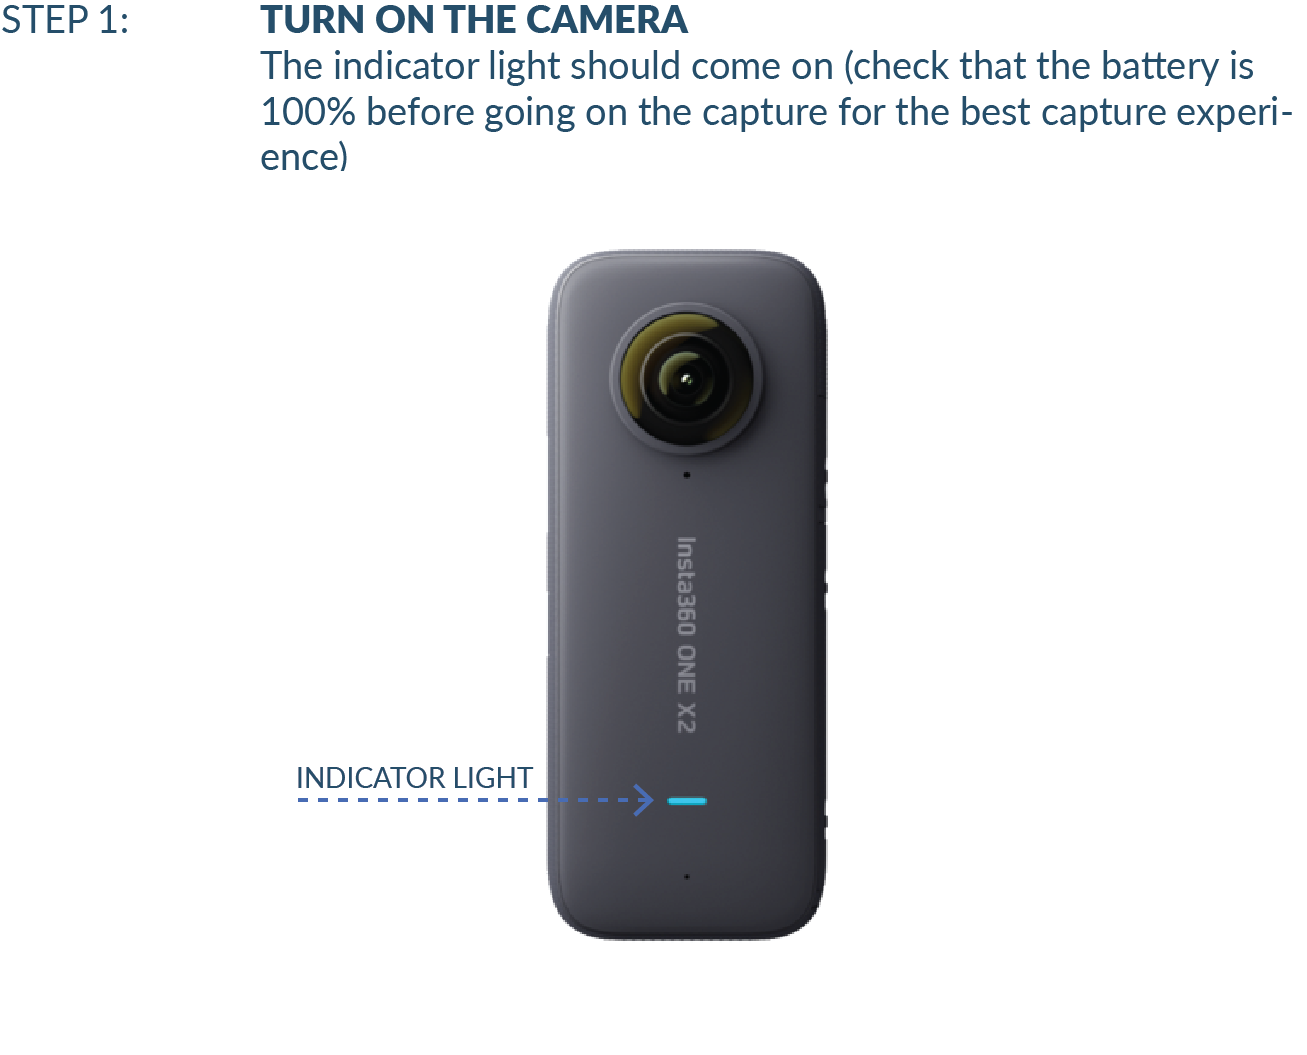
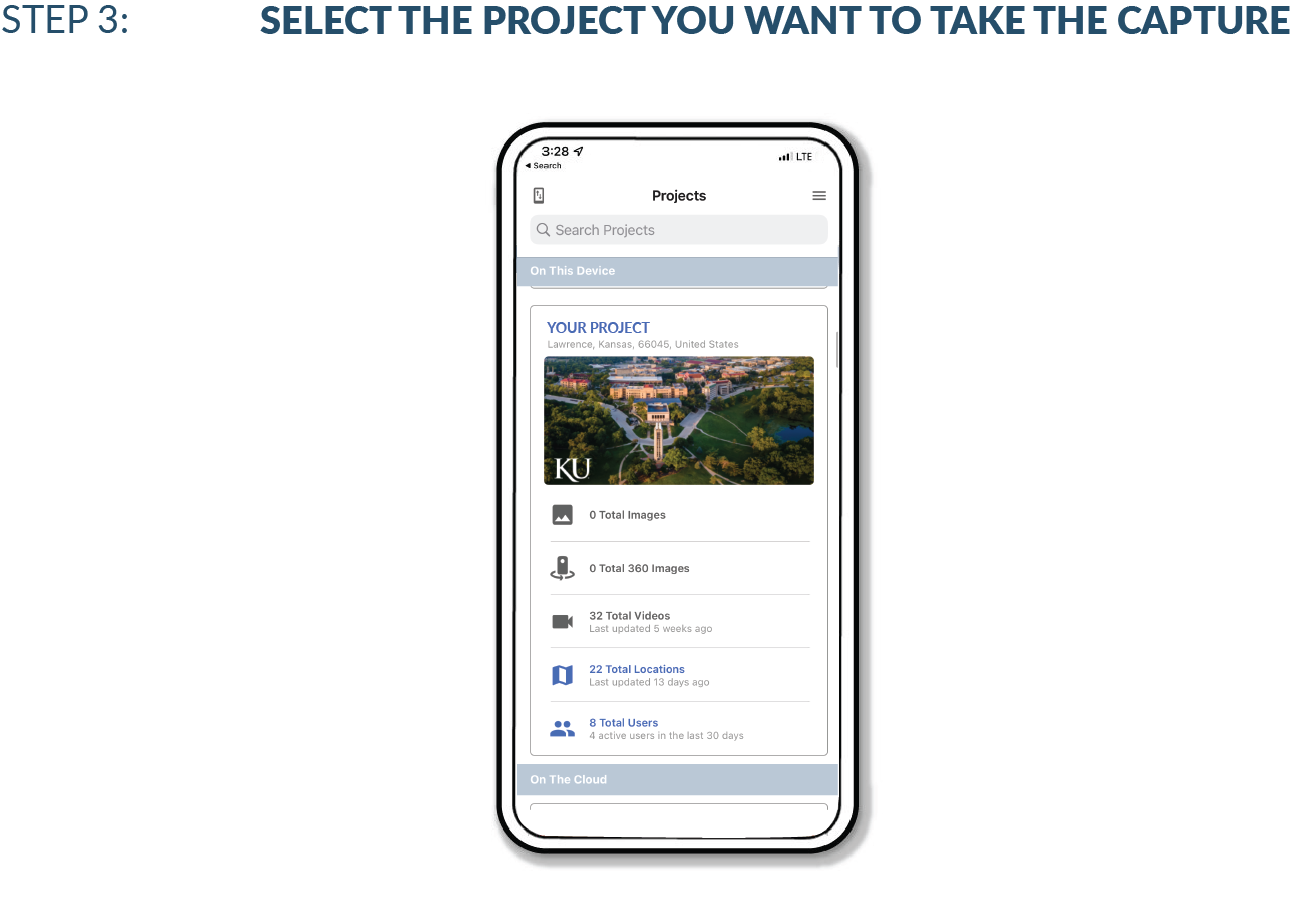
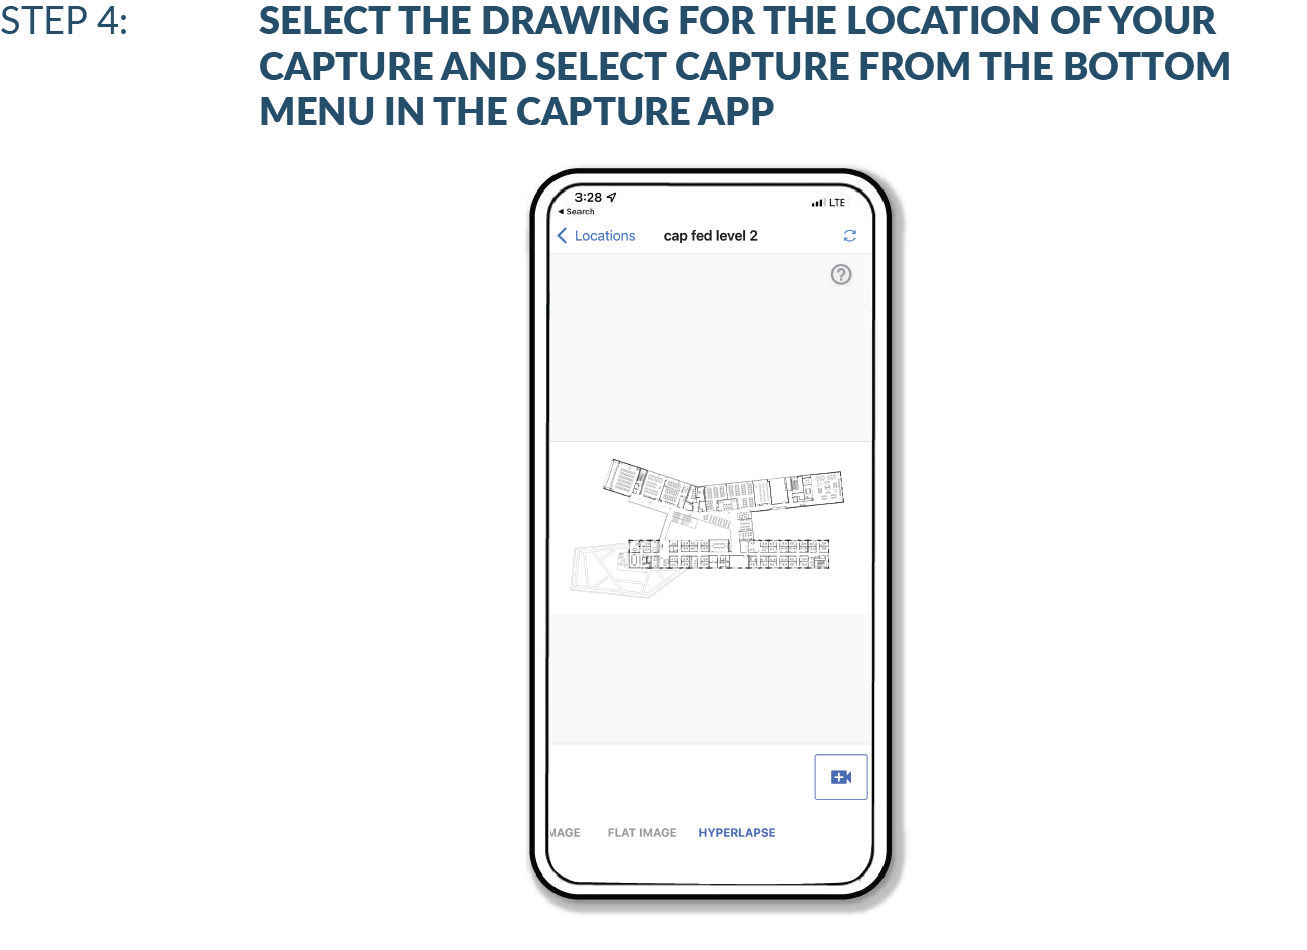
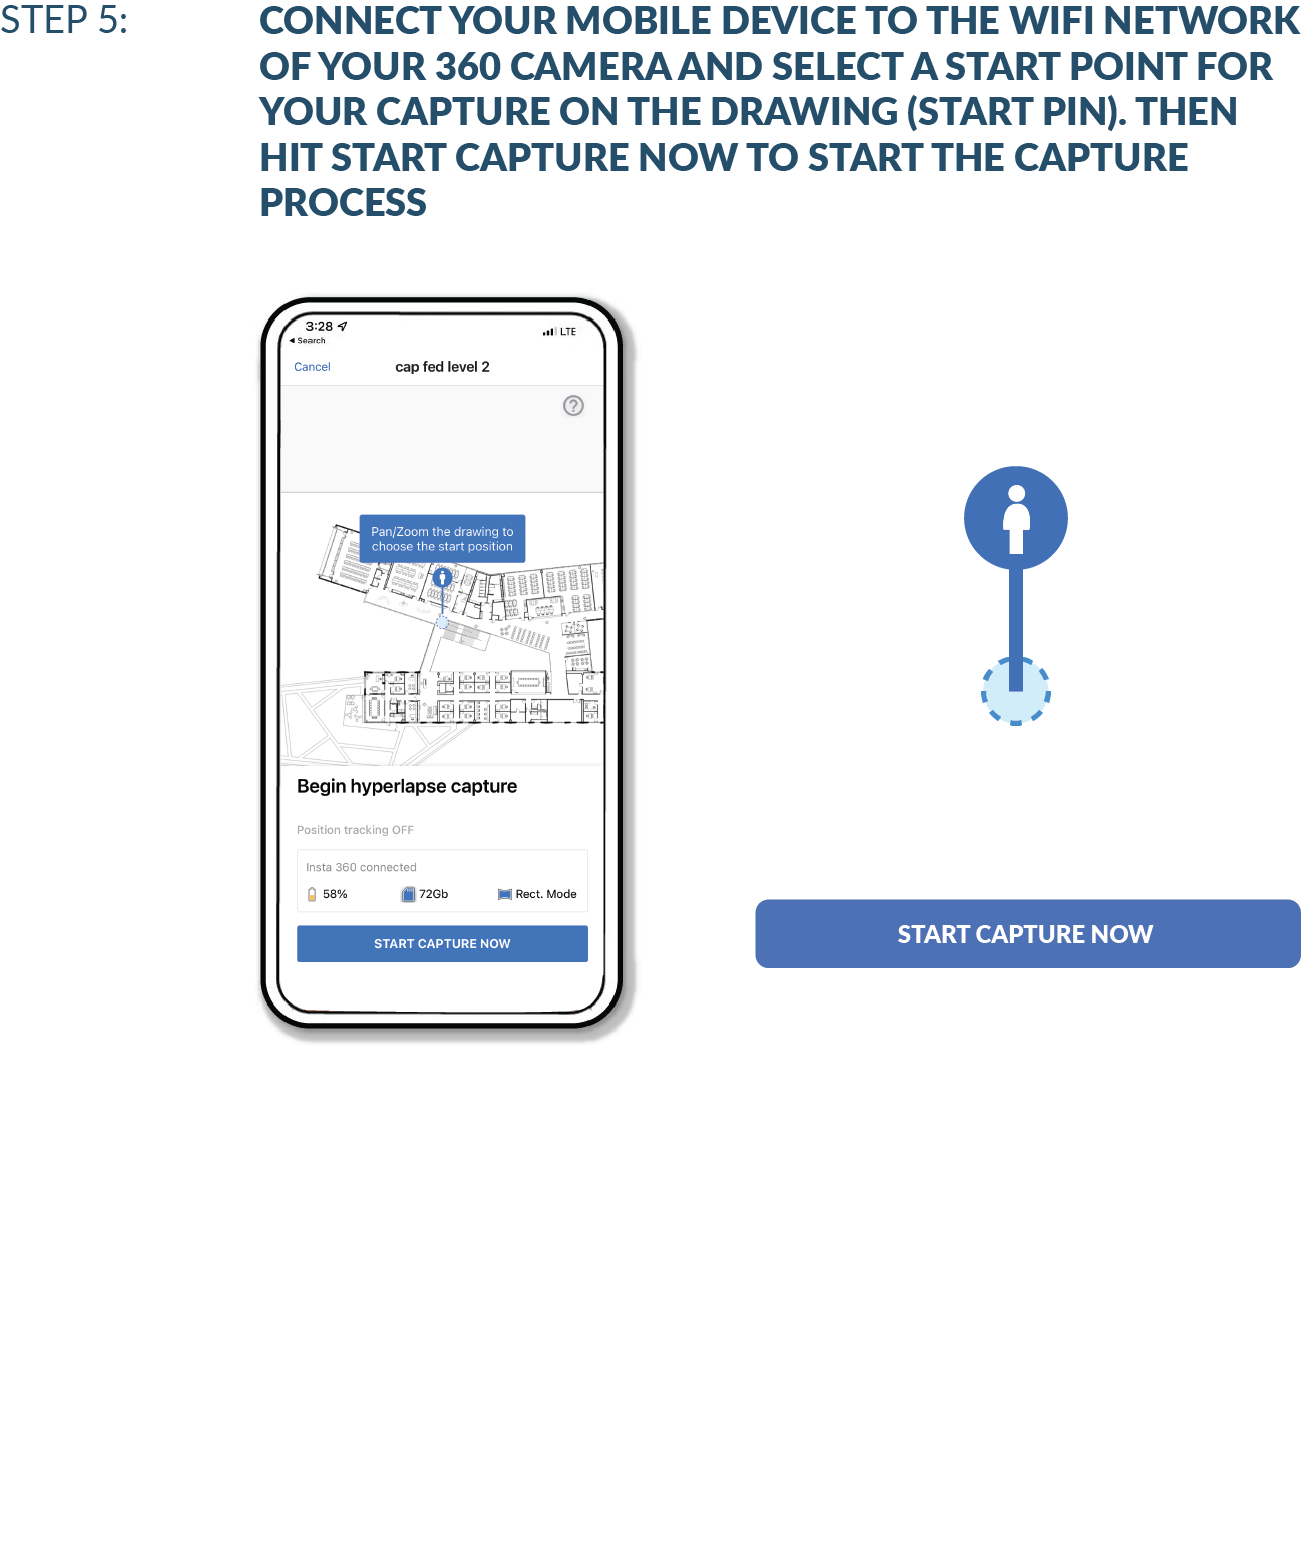
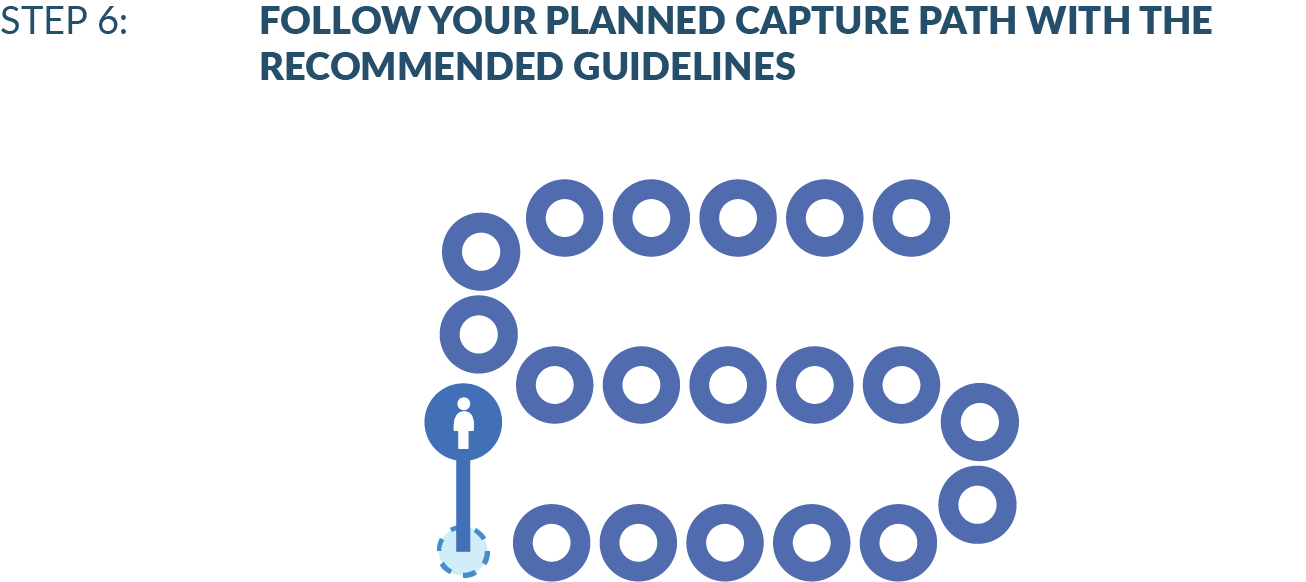
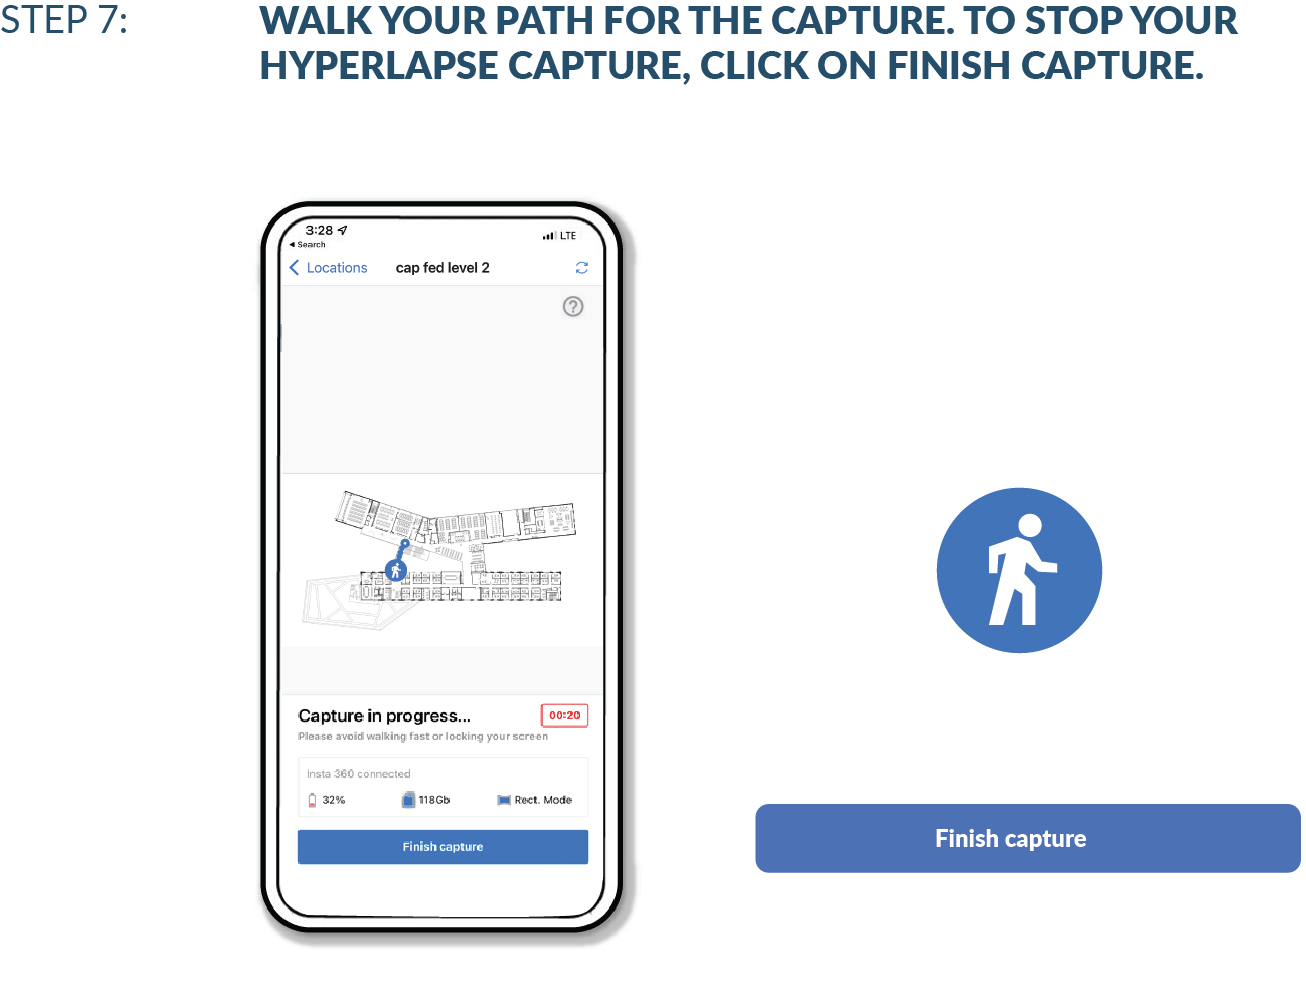
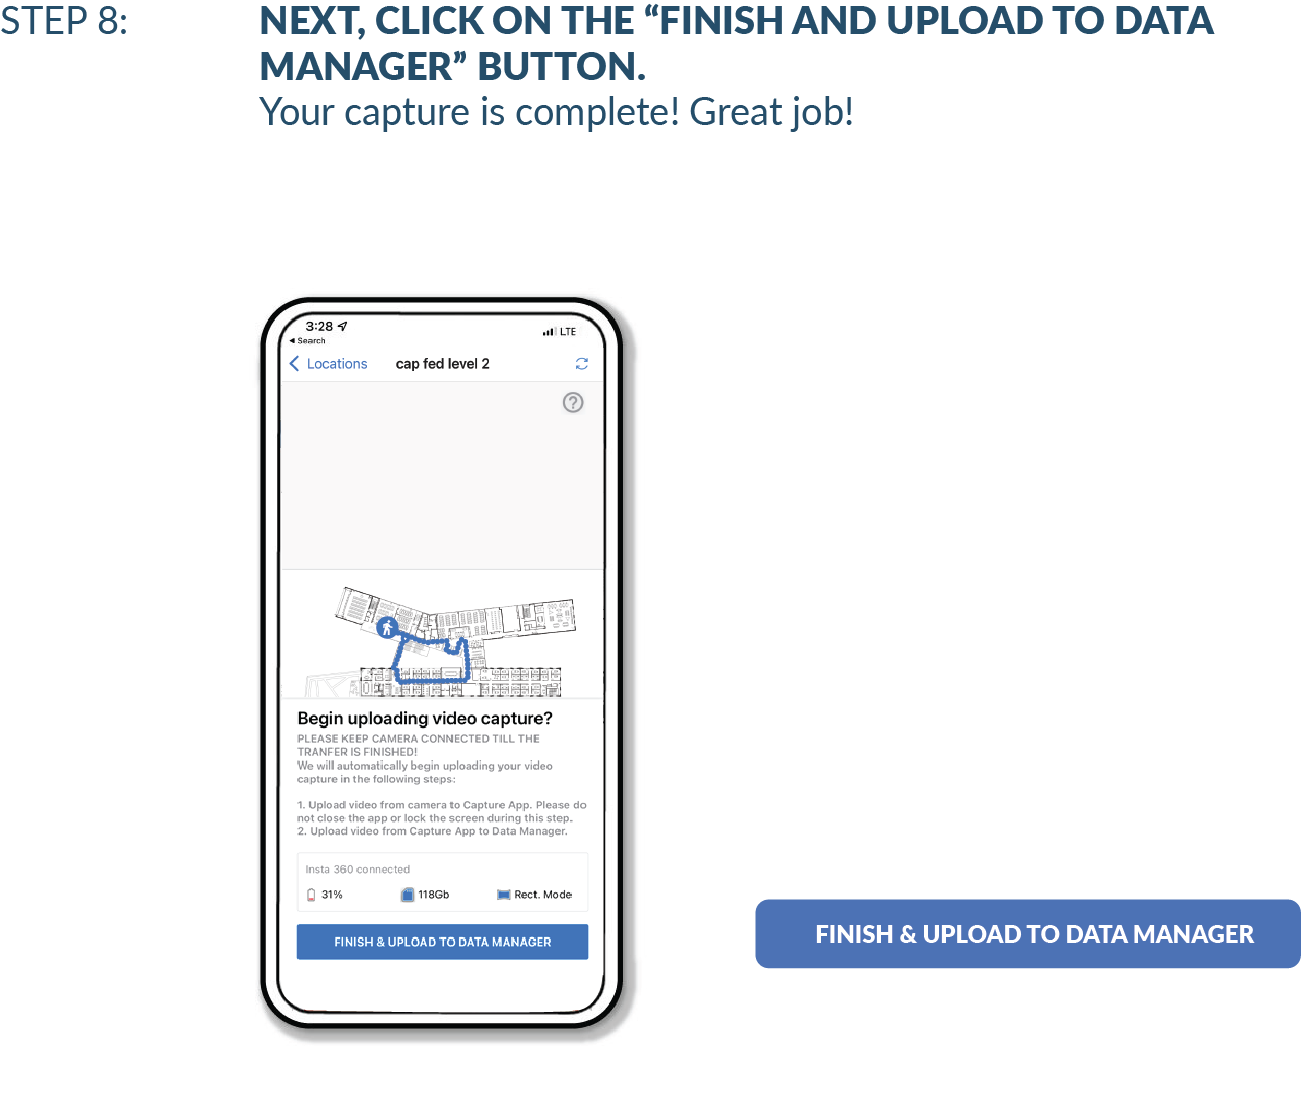
Best Practices and Capture Tutorials
| Tip | Description | Graphics |
| 1 |
Walk Fast (bad) Walk Slow (good) |
Blurry Photo Clear Photo |
| 2 |
Low Light Good Light |
Dark Photo Good Contrast Photo |
| 3 |
Going too fast. Move slow around corners, doorways to prevent point clouds splitting, changing light conditions. |
Show broken reconstruction or discontinuity. Show image sequence through a doorway around a corner. Top down capture path with donuts. |
| 4 |
(Walls) Walk too close Walk good distance 3 ft and 6 ft |
Distorted tall wall Good wall reconstruction |
| 5 |
Long time in large space (lawn mower) Short time in large space (in / out) |
Good ortho. Distorted ortho. |
| 6 |
Obstacles in the way Circumnavigate – Walk around objects (Obstacles removed) |
Ortho with space missing behind an object Ortho with complete ortho and capture path around object |
| 7 |
(Overhead / Ceiling) Poor coverage Multiple heights for tall |
Point cloud with one capture level Dense point cloud with multiple levels |
| 8 |
Redundancy No redundancy |
Floor plan with redundancy Floor plan w/o |
Looking for Help?
Visit the Help Center or get in touch with the Customer Success Team.
