TAKING A HYPERLAPSE (VIDEO) CAPTURE WITH A 360 CAMERA
Creating a proper capture creates a better & crisp 3D model, which will make your project stakeholders happy when they view reports and meetings!
Before beginning, please read the CAPTURE BEST PRACTICES.
STEP 1: TURN ON THE CAMERA
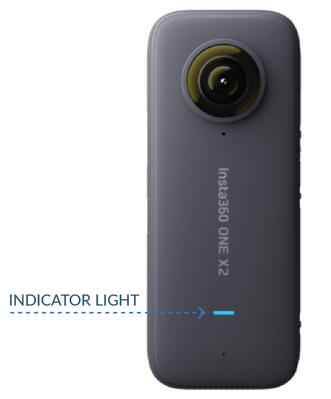
The indicator light should come on (Check that the battery is 100% before going on the capture for the best capture and experience).
![360](https://reconstructinc.com/hs-fs/hubfs/Reconstruct_February2023/Images/360_image_1-1.png?width=331&height=399&name=360_image_1-1.png)
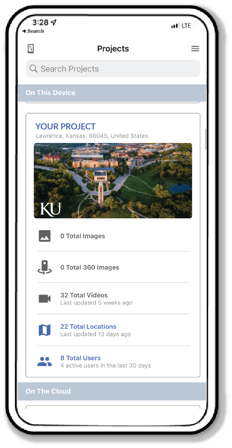
STEP 2: OPEN THE CAPTURE APP ON MOBILE DEVICE.
![360](https://reconstructinc.com/hs-fs/hubfs/Reconstruct_February2023/Images/360_image_2-1.png?width=250&height=250&name=360_image_2-1.png)
STEP 3: SELECT THE PROJECT YOU WANT TO CAPTURE.
![360](https://reconstructinc.com/hs-fs/hubfs/Reconstruct_February2023/Images/360_image_03-1.png?width=232&height=448&name=360_image_03-1.png)
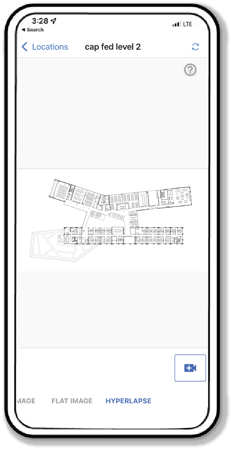
STEP 4: DRAWING SELECTION AND SELECTING HYPERLAPSE (AKA VIDEO)
Here are the steps:
- Select the drawing for the location of your capture
- Select HYPERLAPSE from the bottom menu
- Then tap the camera icon
![Planning](https://reconstructinc.com/hs-fs/hubfs/Reconstruct_February2023/Images/planning_image_1-1-1.png?width=231&height=451&name=planning_image_1-1-1.png)
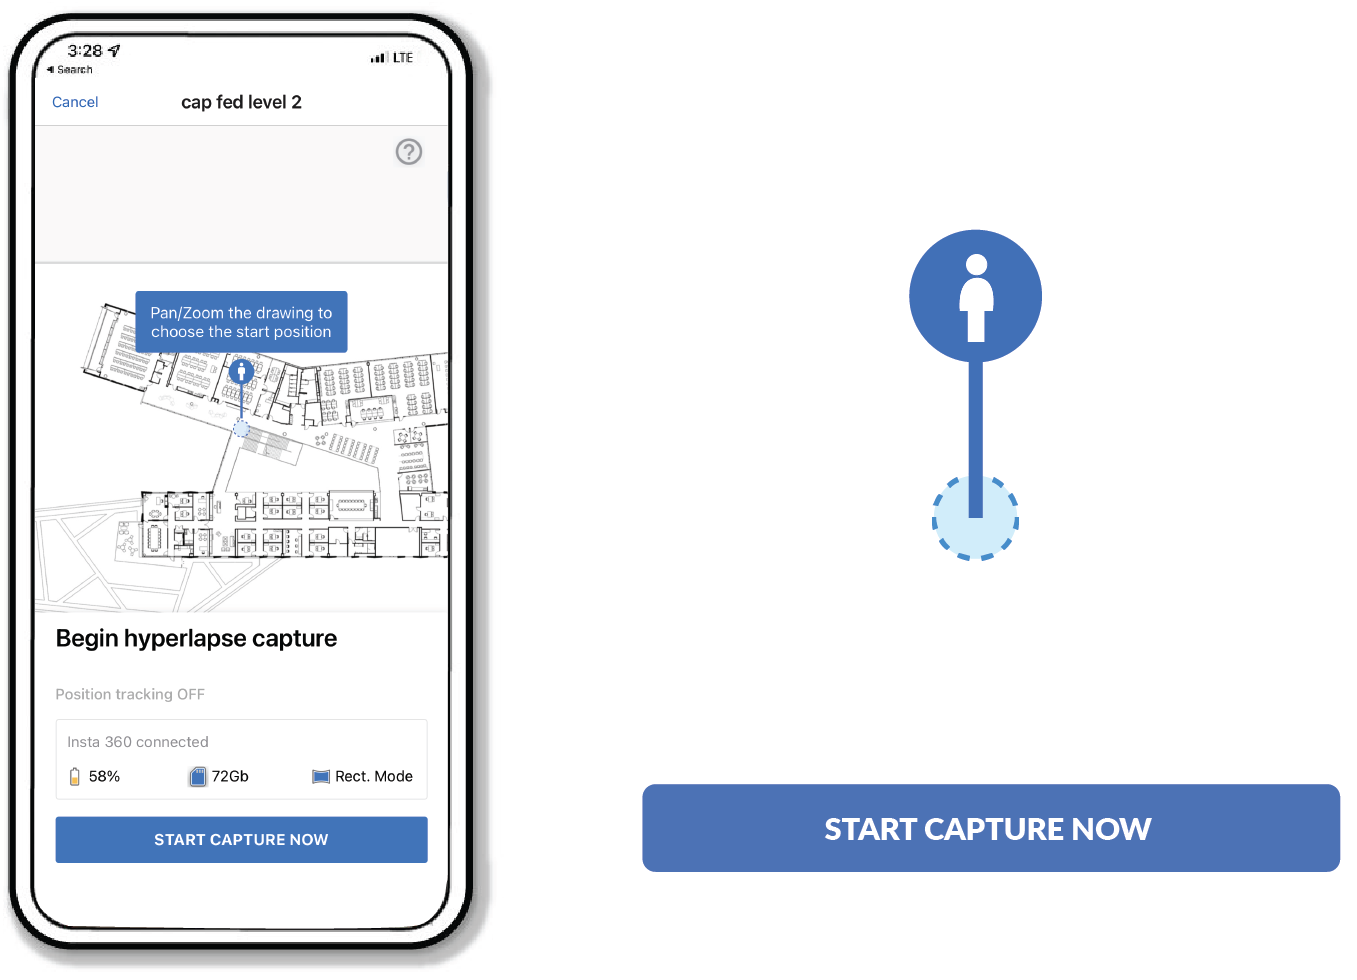
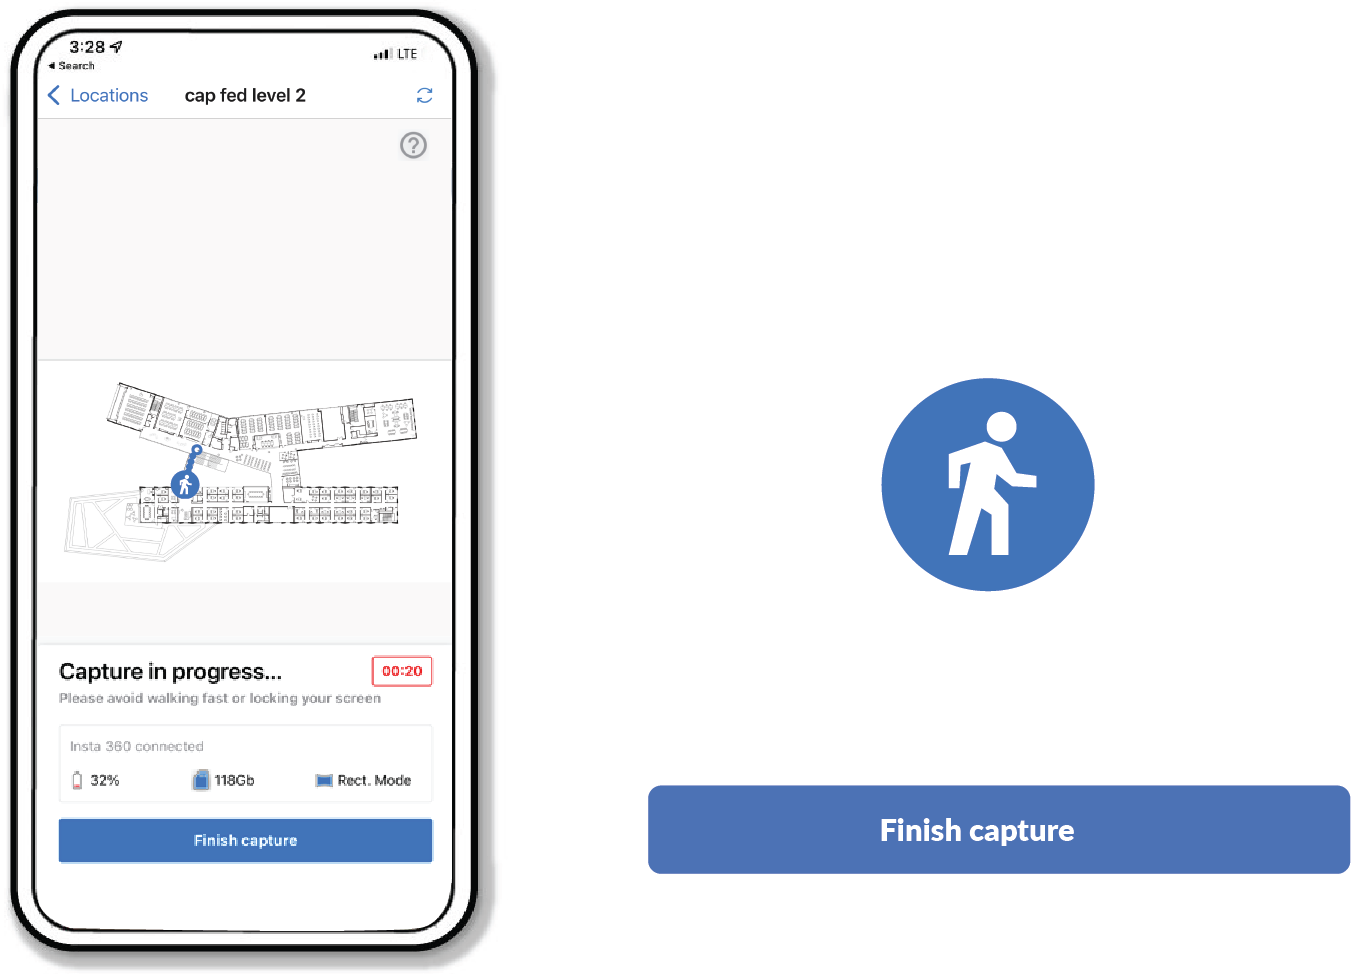
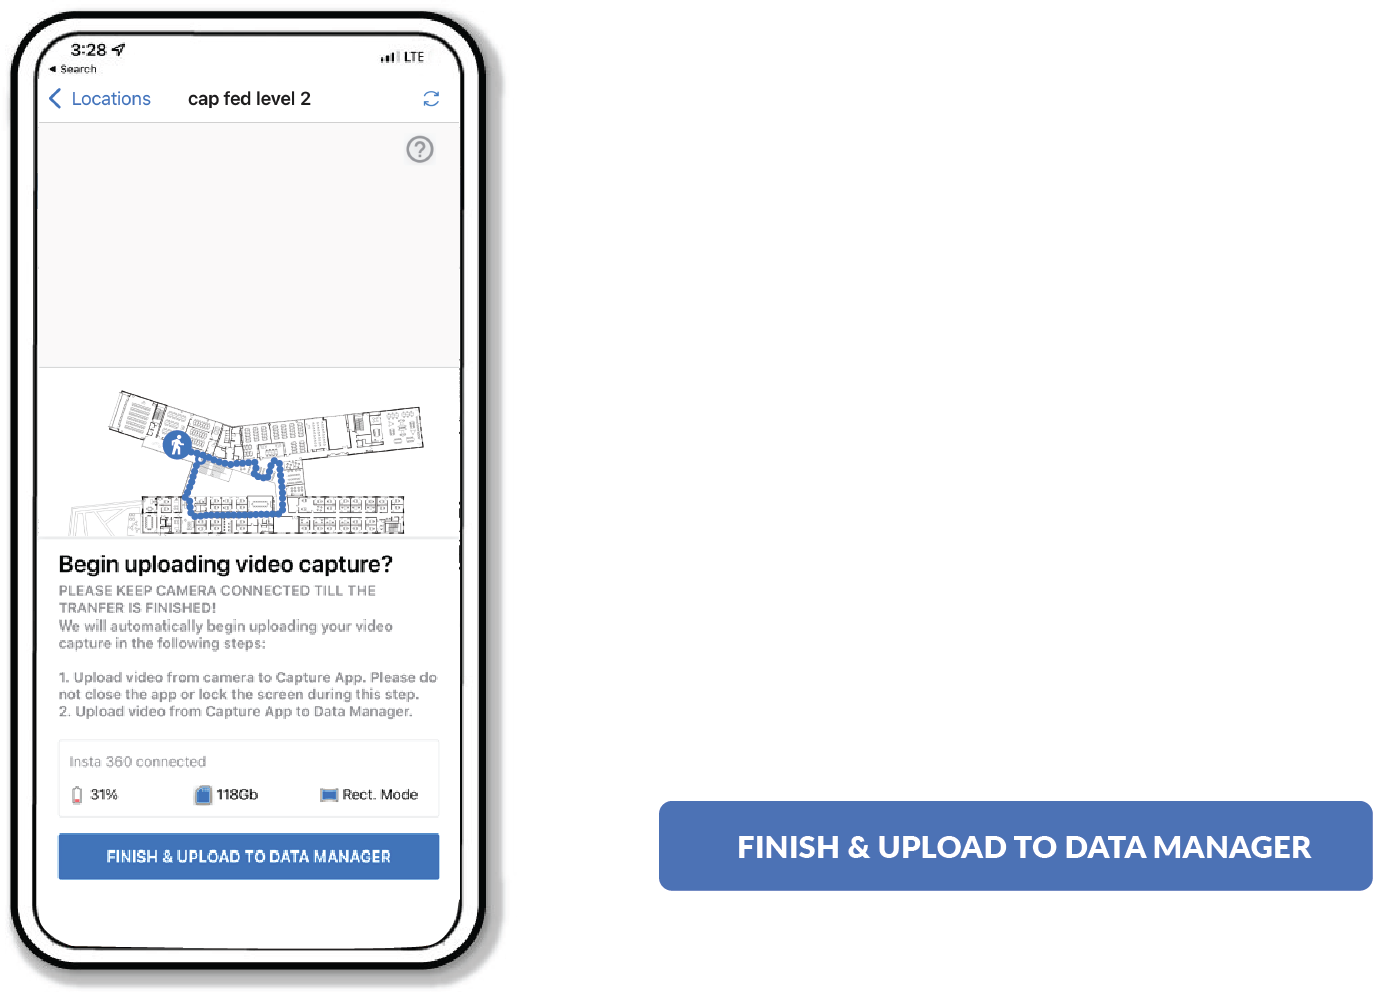
STEP 5: CONNECT YOUR MOBILE DEVICE TO THE WIFI NETWORK OF YOUR 360 CAMERA AND SELECT A START POINT FOR YOUR CAPTURE ON THE FLOOR DRAWING. THEN HIT START CAPTURE NOW TO START THE CAPTURE PROCESS.
![360](https://reconstructinc.com/hubfs/Reconstruct_February2023/Images/360_image_5-1.png)
STEP 6: FOLOW YOUR PLANNED CAPTURE PATH WITH RECOMMENDED GUIDELINES.
![360](https://reconstructinc.com/hs-fs/hubfs/Reconstruct_February2023/Images/360_image_6-1.png?width=445&height=300&name=360_image_6-1.png)
STEP 7: WHEN FINISHED, STOP YOUR HYPERLAPSE CAPTURE BY TAPPING “FINISH CAPTURE”.
You will be prompted to select your end location. This is an important step to orient and align your capture.
![Finish Capture](https://reconstructinc.com/hubfs/Reconstruct_February2023/Images/360_image_07-1.png)
STEP 8: NEXT, TO UPLOAD YOUR CAPTURE TO YOUR PROJECT, TAP “FINISH AND UPLOAD TO DATA MANAGER”.
YOUR CAPTURE IS COMPLETE. GREAT JOB!
![Finish Upload](https://reconstructinc.com/hubfs/Reconstruct_February2023/Images/360_image_08-1.png)
Looking for Help?
Visit the Help Center or get in touch with the Customer Success Team.